A modern newsroom requires a robust system to manage content efficiently. Pressmaster provides a CMS (Content Management System) designed for this purpose.
Pressmaster's CMS is a platform that lets you build and manage your newsroom. It uses a drag-and-drop system which makes it easy to design your layout without needing to code. You have access to various templates to get started.
Once your newsroom is built, the system is designed to run on autopilot. This means that every single article you write will be automatically published to your newsroom without any manual intervention required.
Additionally, Pressmaster's CMS comes with full analytics integration. This feature allows you to track every movement within your newsroom, providing valuable insights into how your content performs. You can see which articles are getting the most attention, where your visitors are coming from, and how they interact with your site. This data is crucial for making informed decisions about your content strategy, helping you to better cater to your audience's interests and improve overall engagement.
When you log into Pressmaster, you’ll find yourself on the main dashboard. To access the heart of your newsroom’s CMS, direct your attention to the left-side menu. Look for an option labeled 'Newsroom.' Clicking this will take you straight to the CMS where you can start shaping your newsroom.
Important:
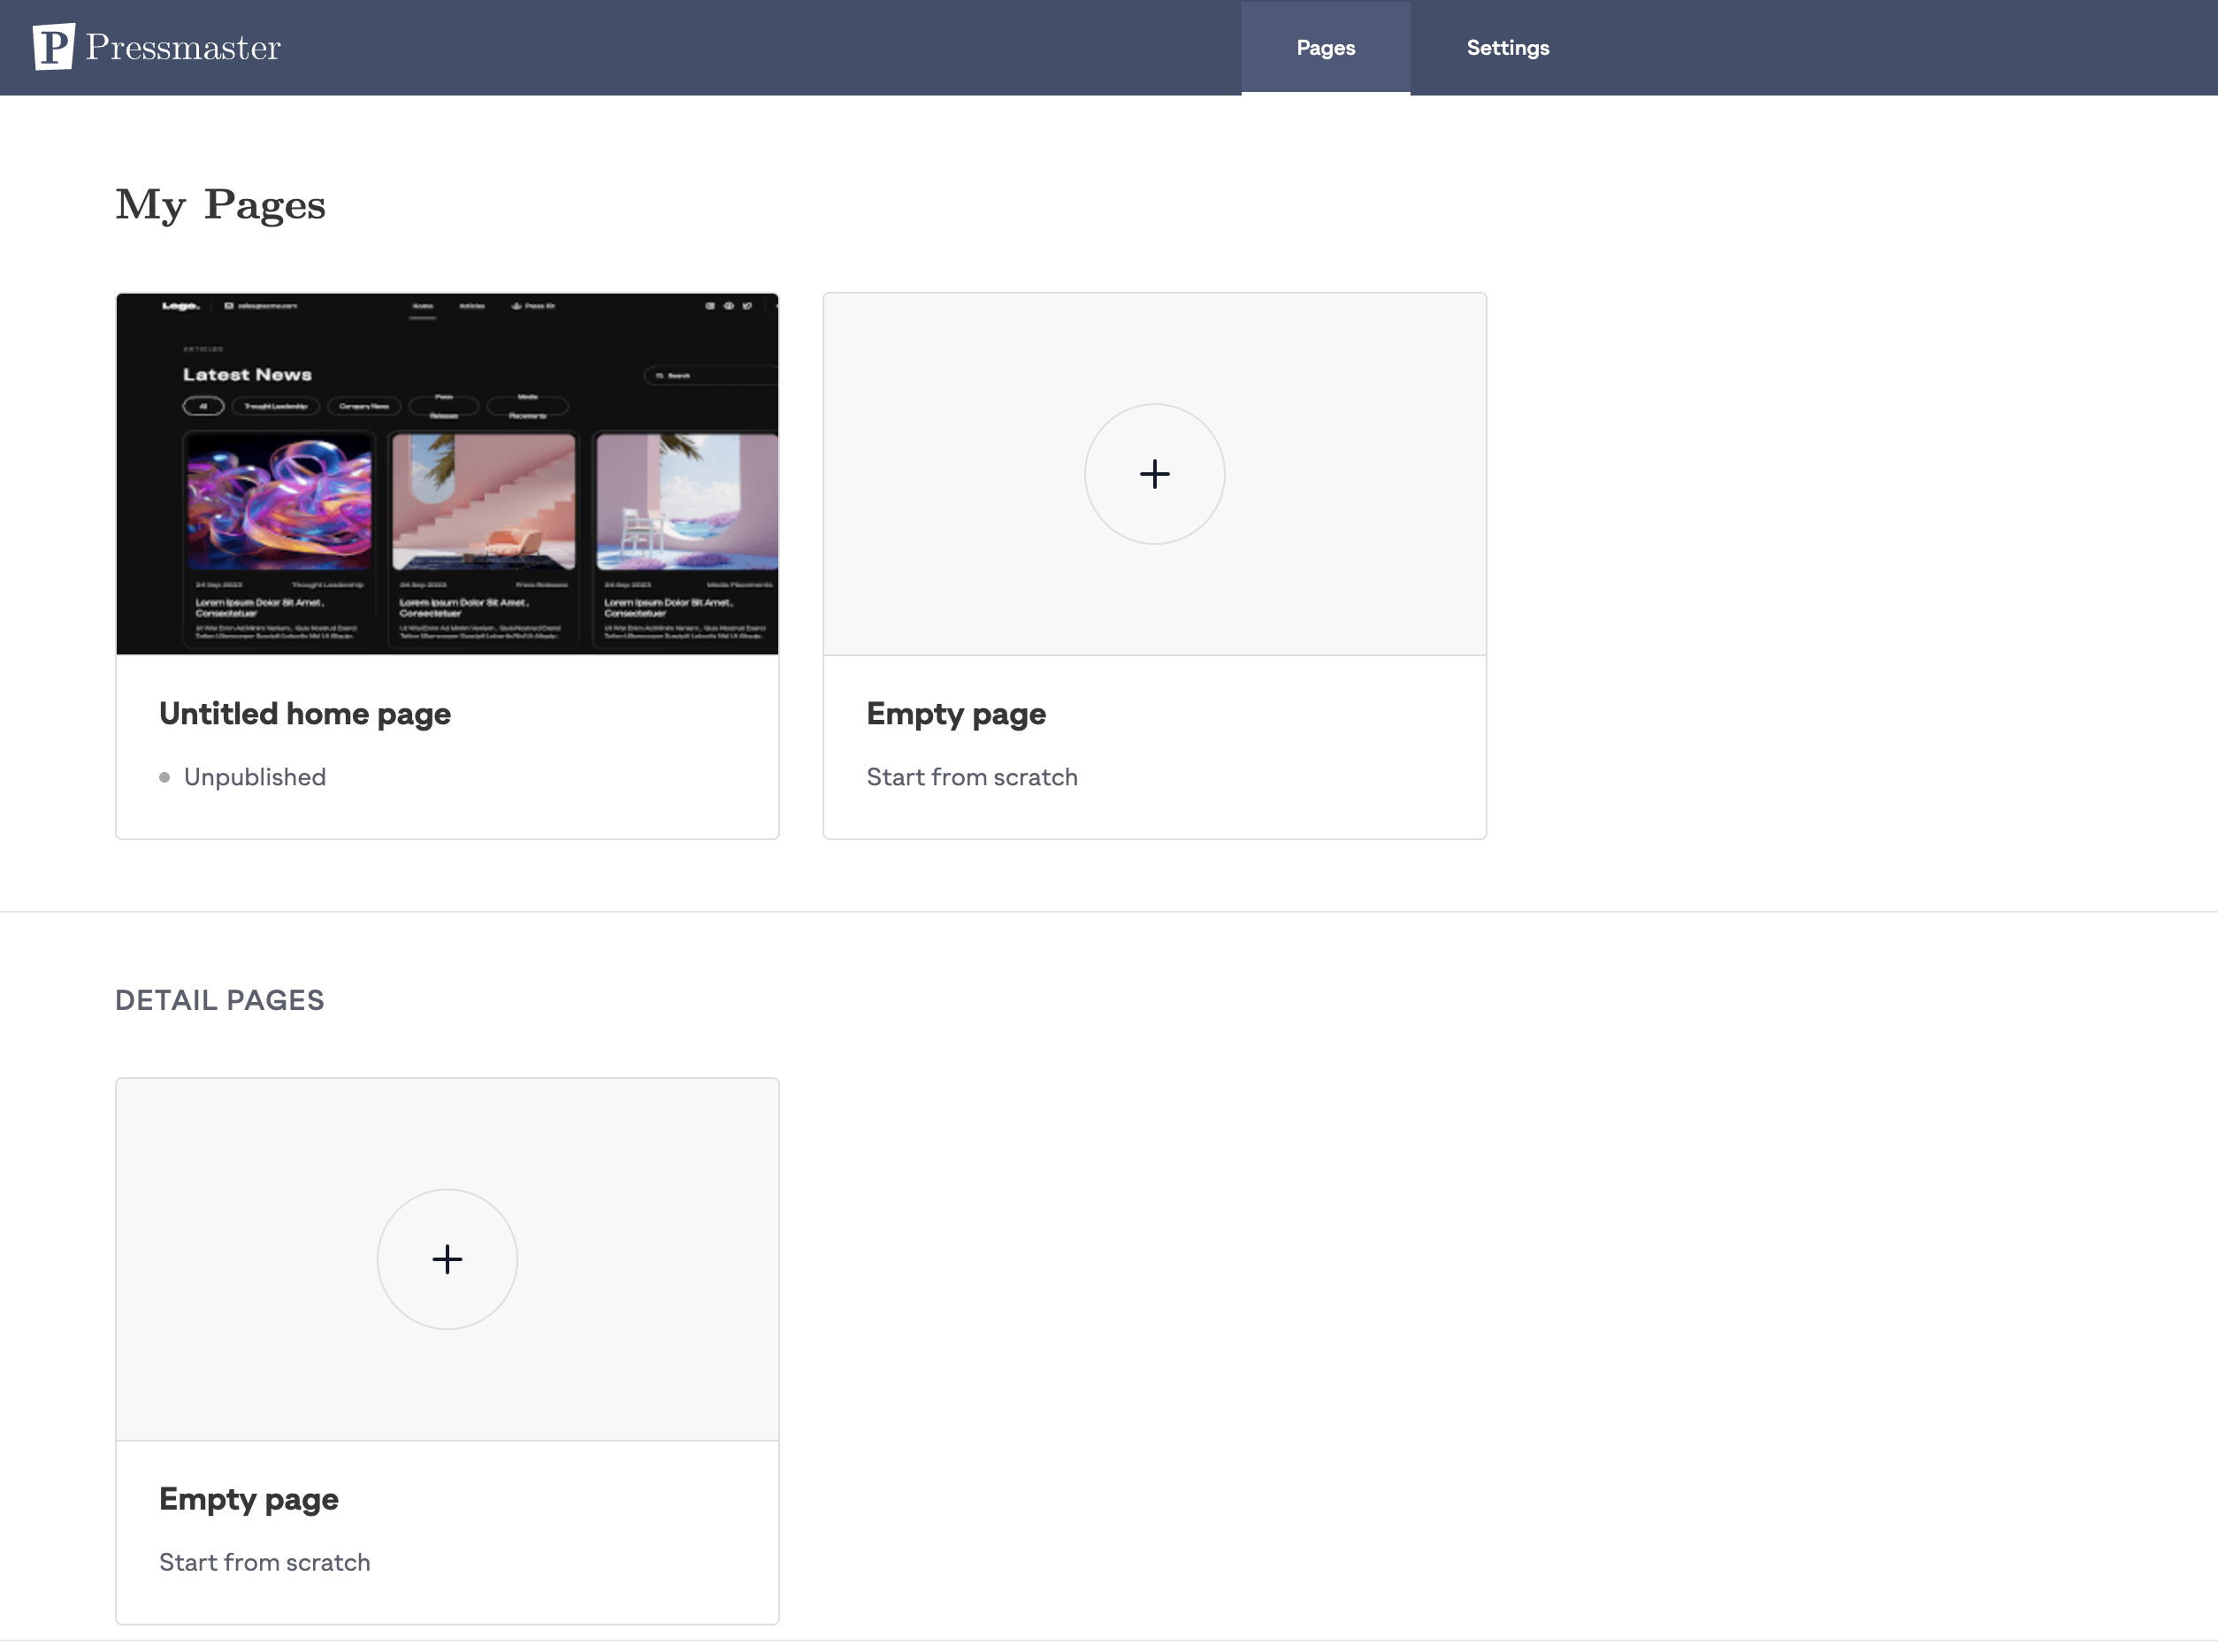
After arriving on the CMS page, you’ll see the starting point for crafting your newsroom: the 'My Pages' section. It's essential to establish two types of pages:
The Newsroom Main Page: This is the homepage for your newsroom, the central hub where your audience will find your curated content, featured stories, and breaking news. To create this, select the 'Empty page' under 'My Pages' to begin designing your main layout. This page sets the tone for your newsroom, so it should be both informative and inviting to your readers.
The Article Detail Page: Here is where individual articles will live. It’s crucial to also design this draft page, which serves as the template for all your future articles. By selecting 'Empty page' under 'Detail Pages,' you can establish a consistent layout for your articles, ensuring each piece of content is presented clearly and maintains your newsroom's style.
Once you've clicked on the "+" symbol to begin crafting your newsroom, you'll be directed to the heart of the Pressmaster CMS. Here, you're equipped to start building your newsroom from the ground up. The CMS interface is designed for ease, allowing you to add sections, customize layout
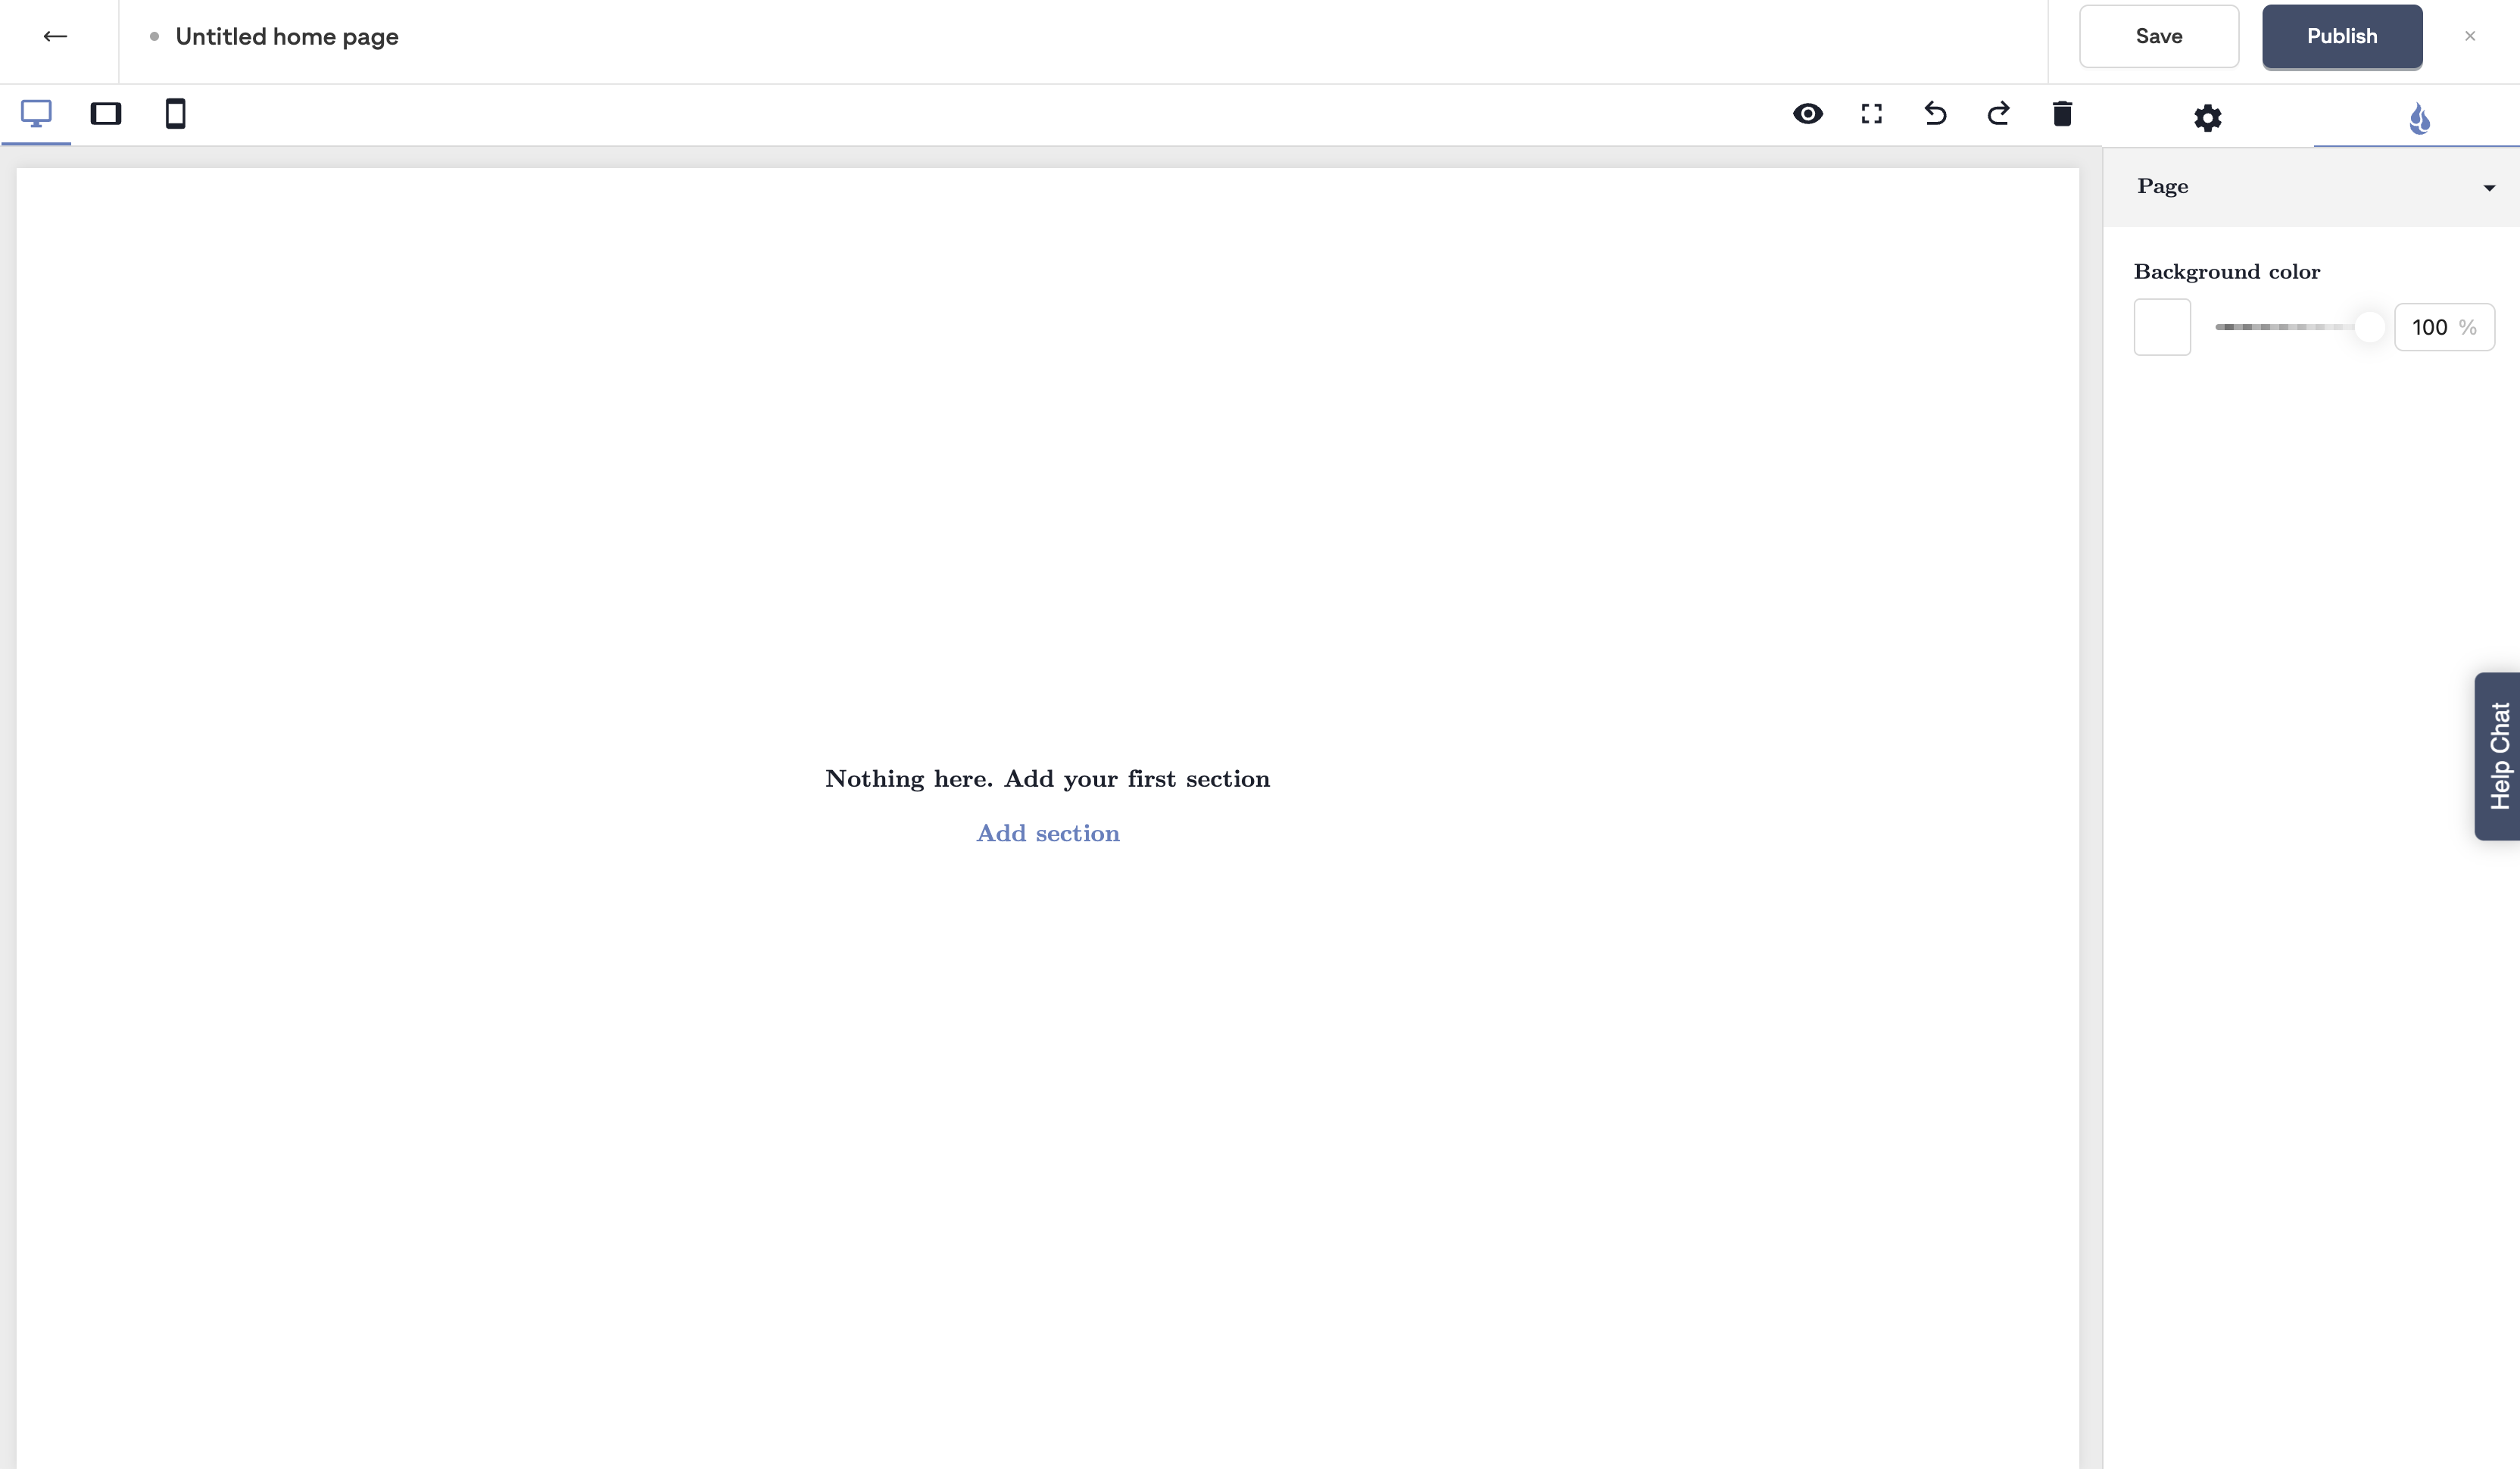
You'll find the option to "Add section" displayed on your blank homepage. Click this to reveal a gallery of pre-designed templates on the left side of your screen. These templates offer a variety of layouts and styles, serving as the starting blocks for your newsroom's design.
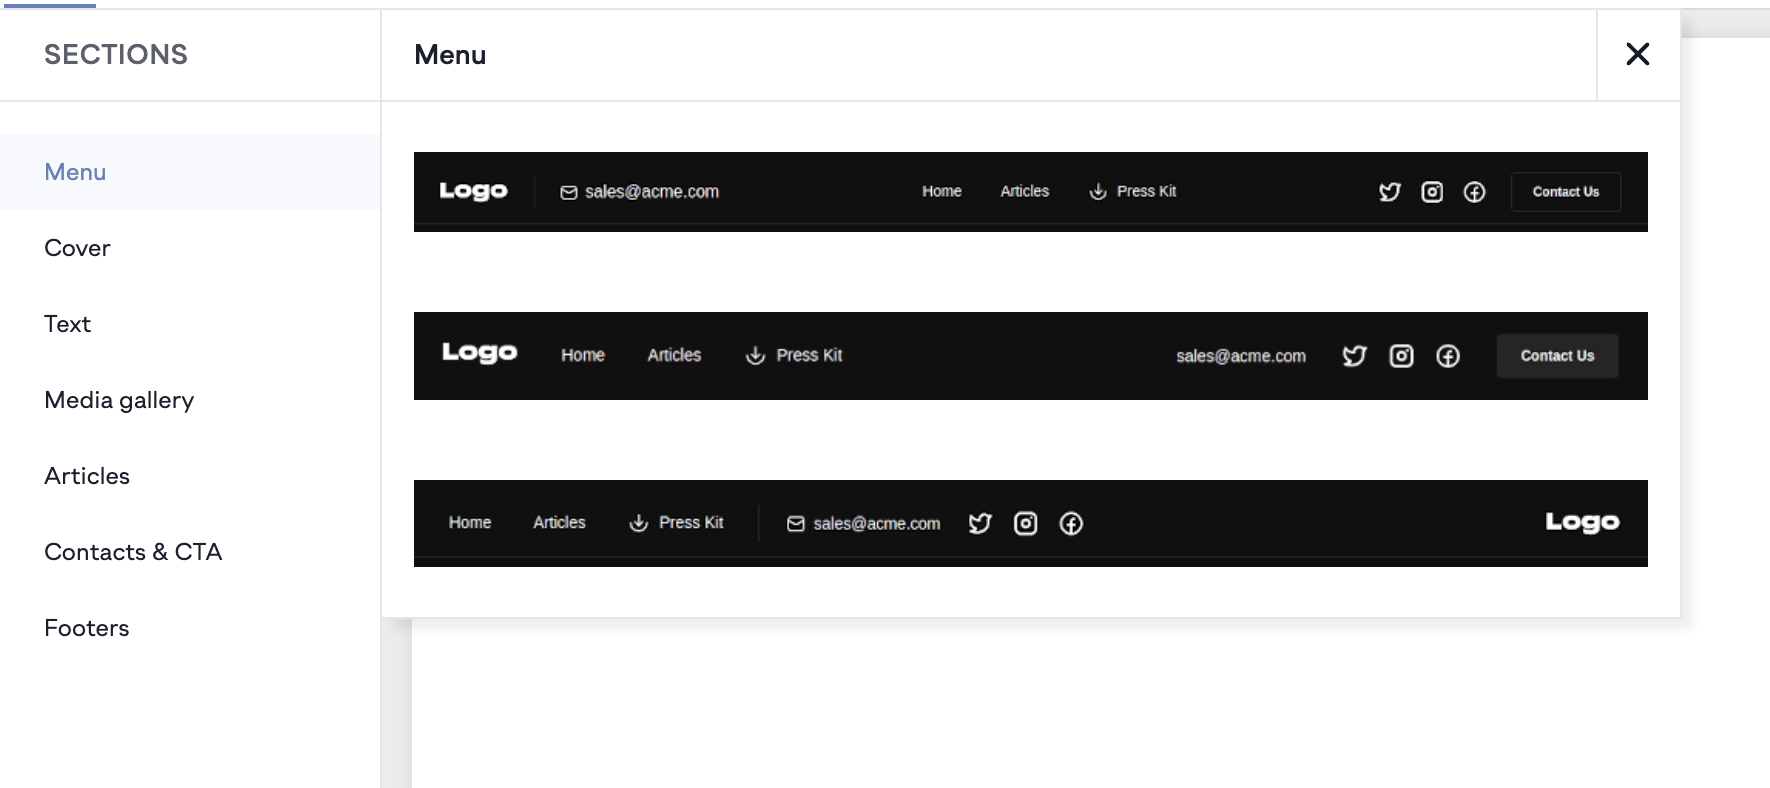
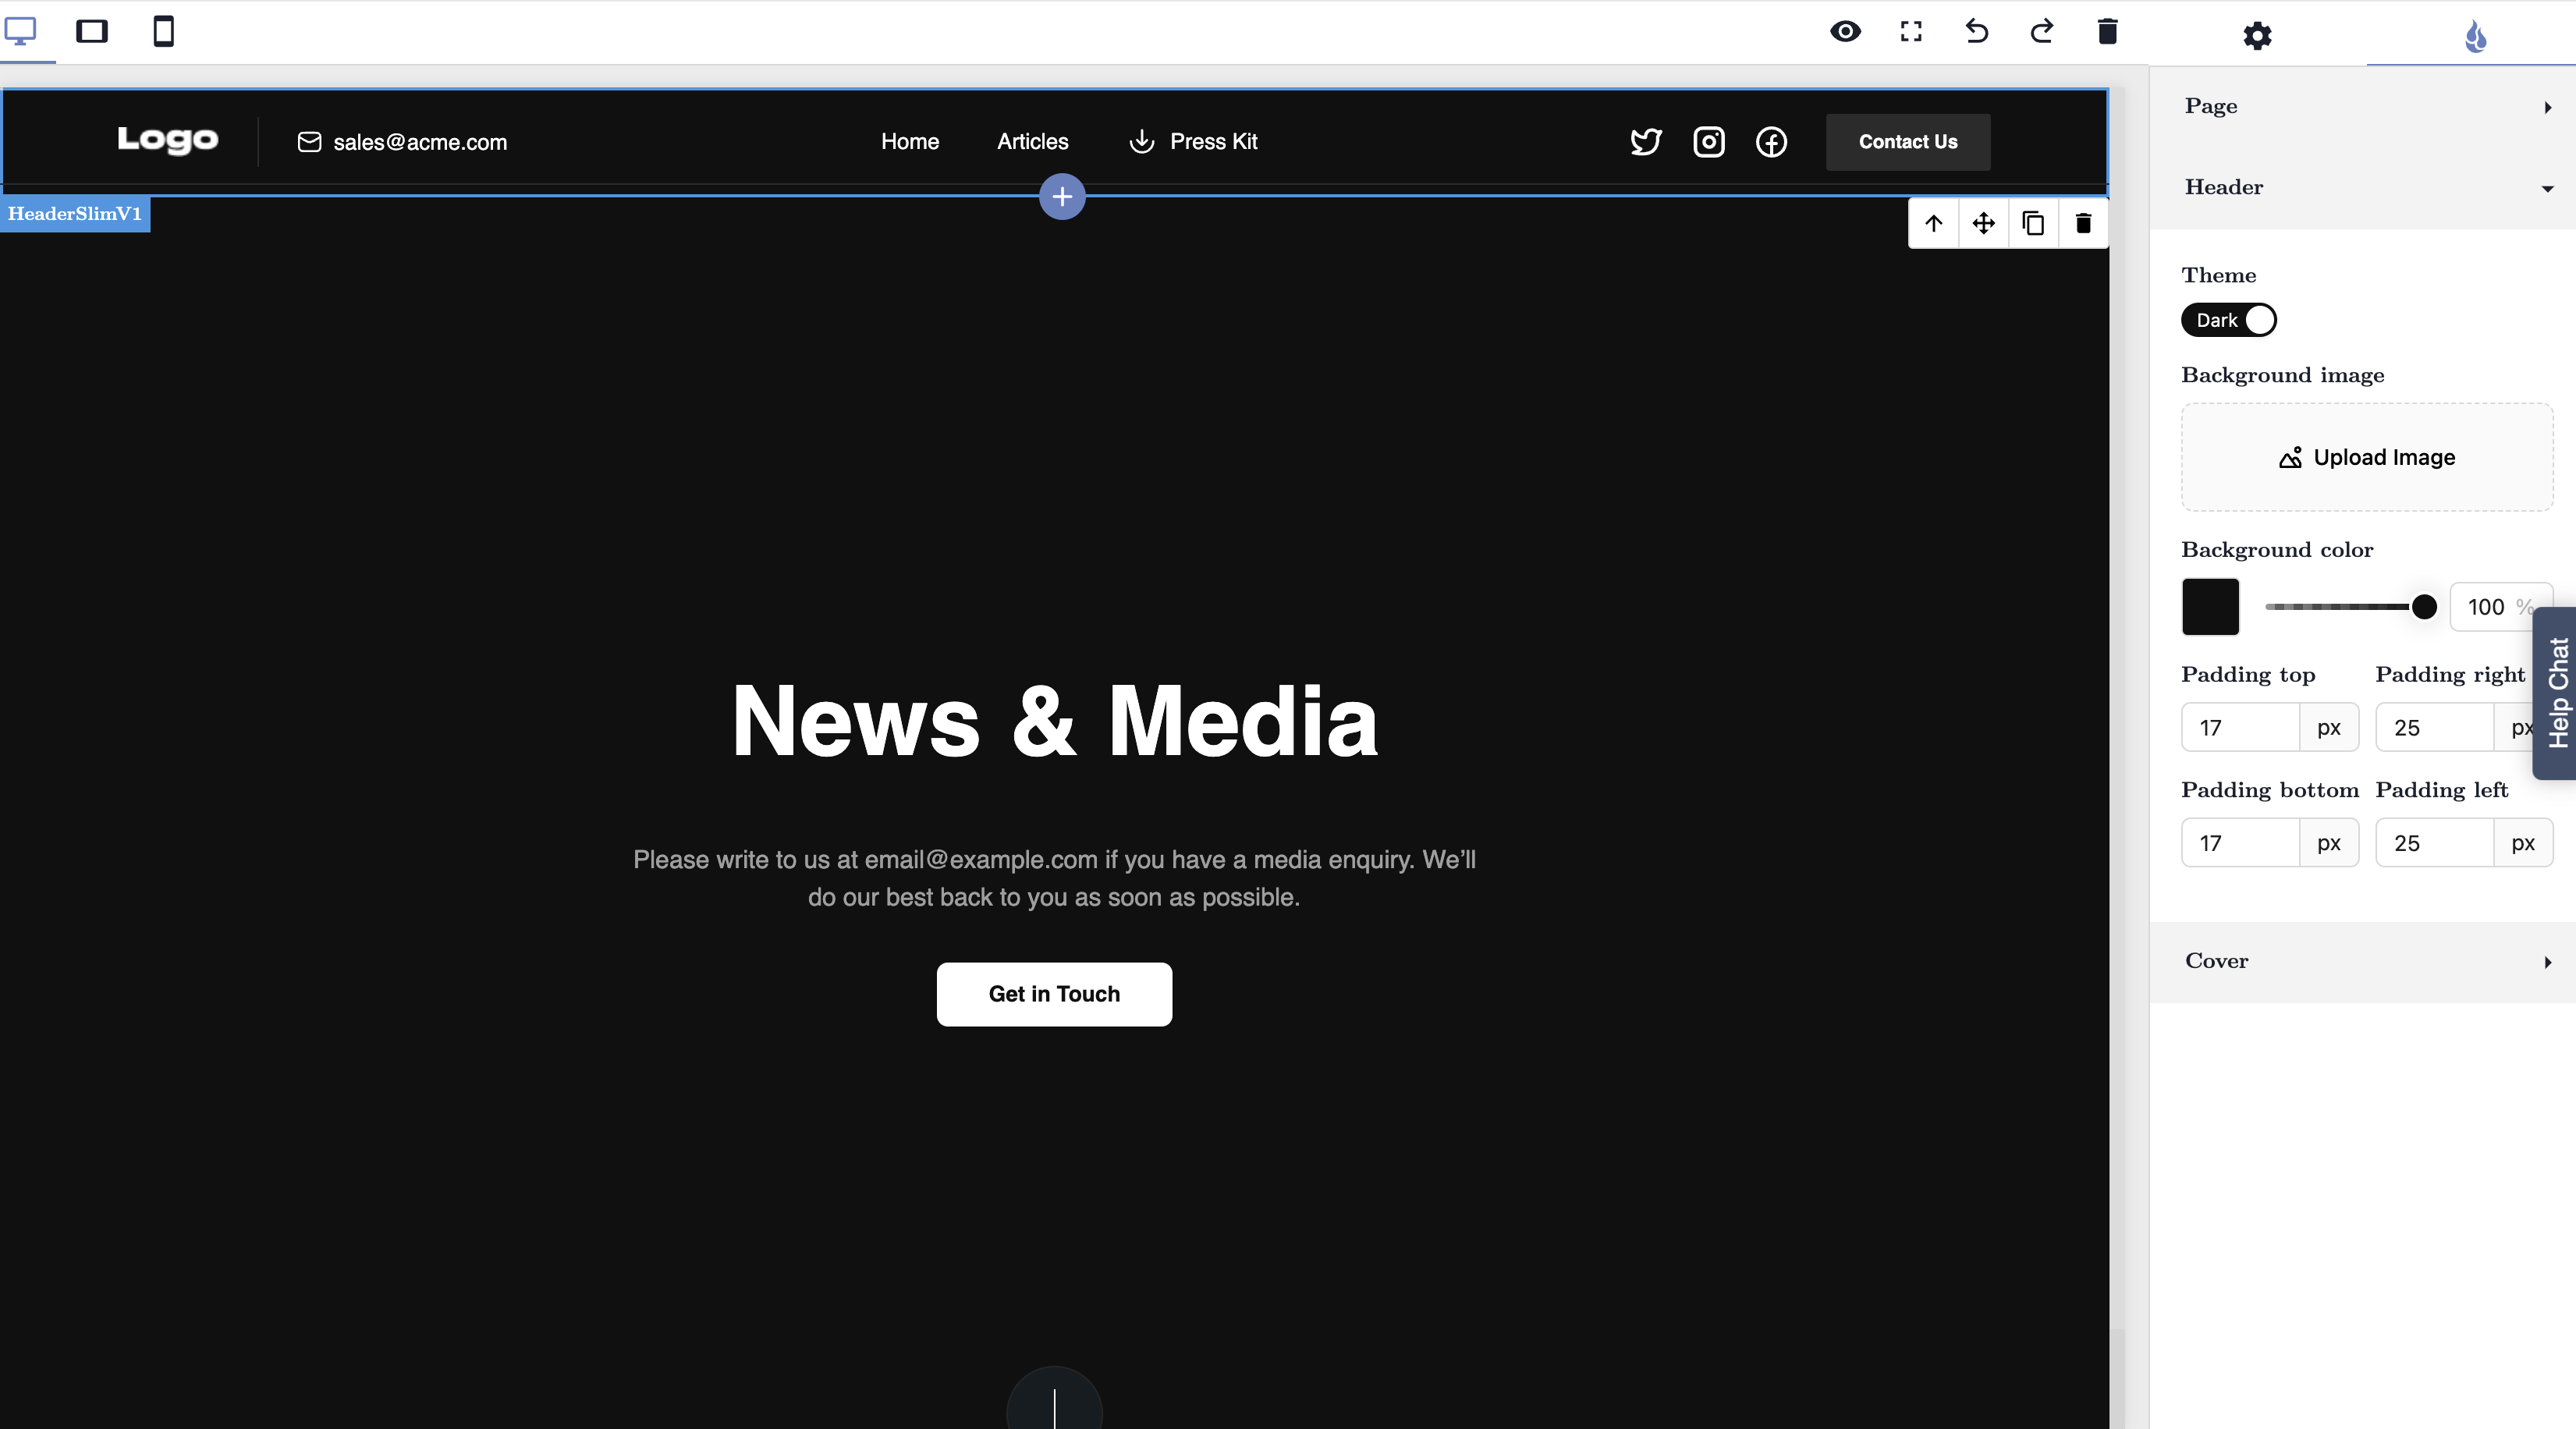
It is best to start by adding a Menu and a Cover section.
If you want to modify any component, be it the menu, the cover image, or text. Simply click on the element you wish to change. A settings menu will appear on the right side, offering customization options such as color schemes, fonts, or uploading your logo.
To personalize your newsroom with your own logo or specific images, simply double-click on the existing image element. A small window will then pop up, presenting you with the option to upload your own images.
Important:
The "Articles" section is a vital component of your newsroom. It's where your audience will access the various pieces you publish. To add this section, select it from the template options within the CMS. Once placed, it will organize your articles into a clean, navigable format, showcasing your latest news and features prominently. Initially, this section may look empty, especially if you haven't published any articles yet
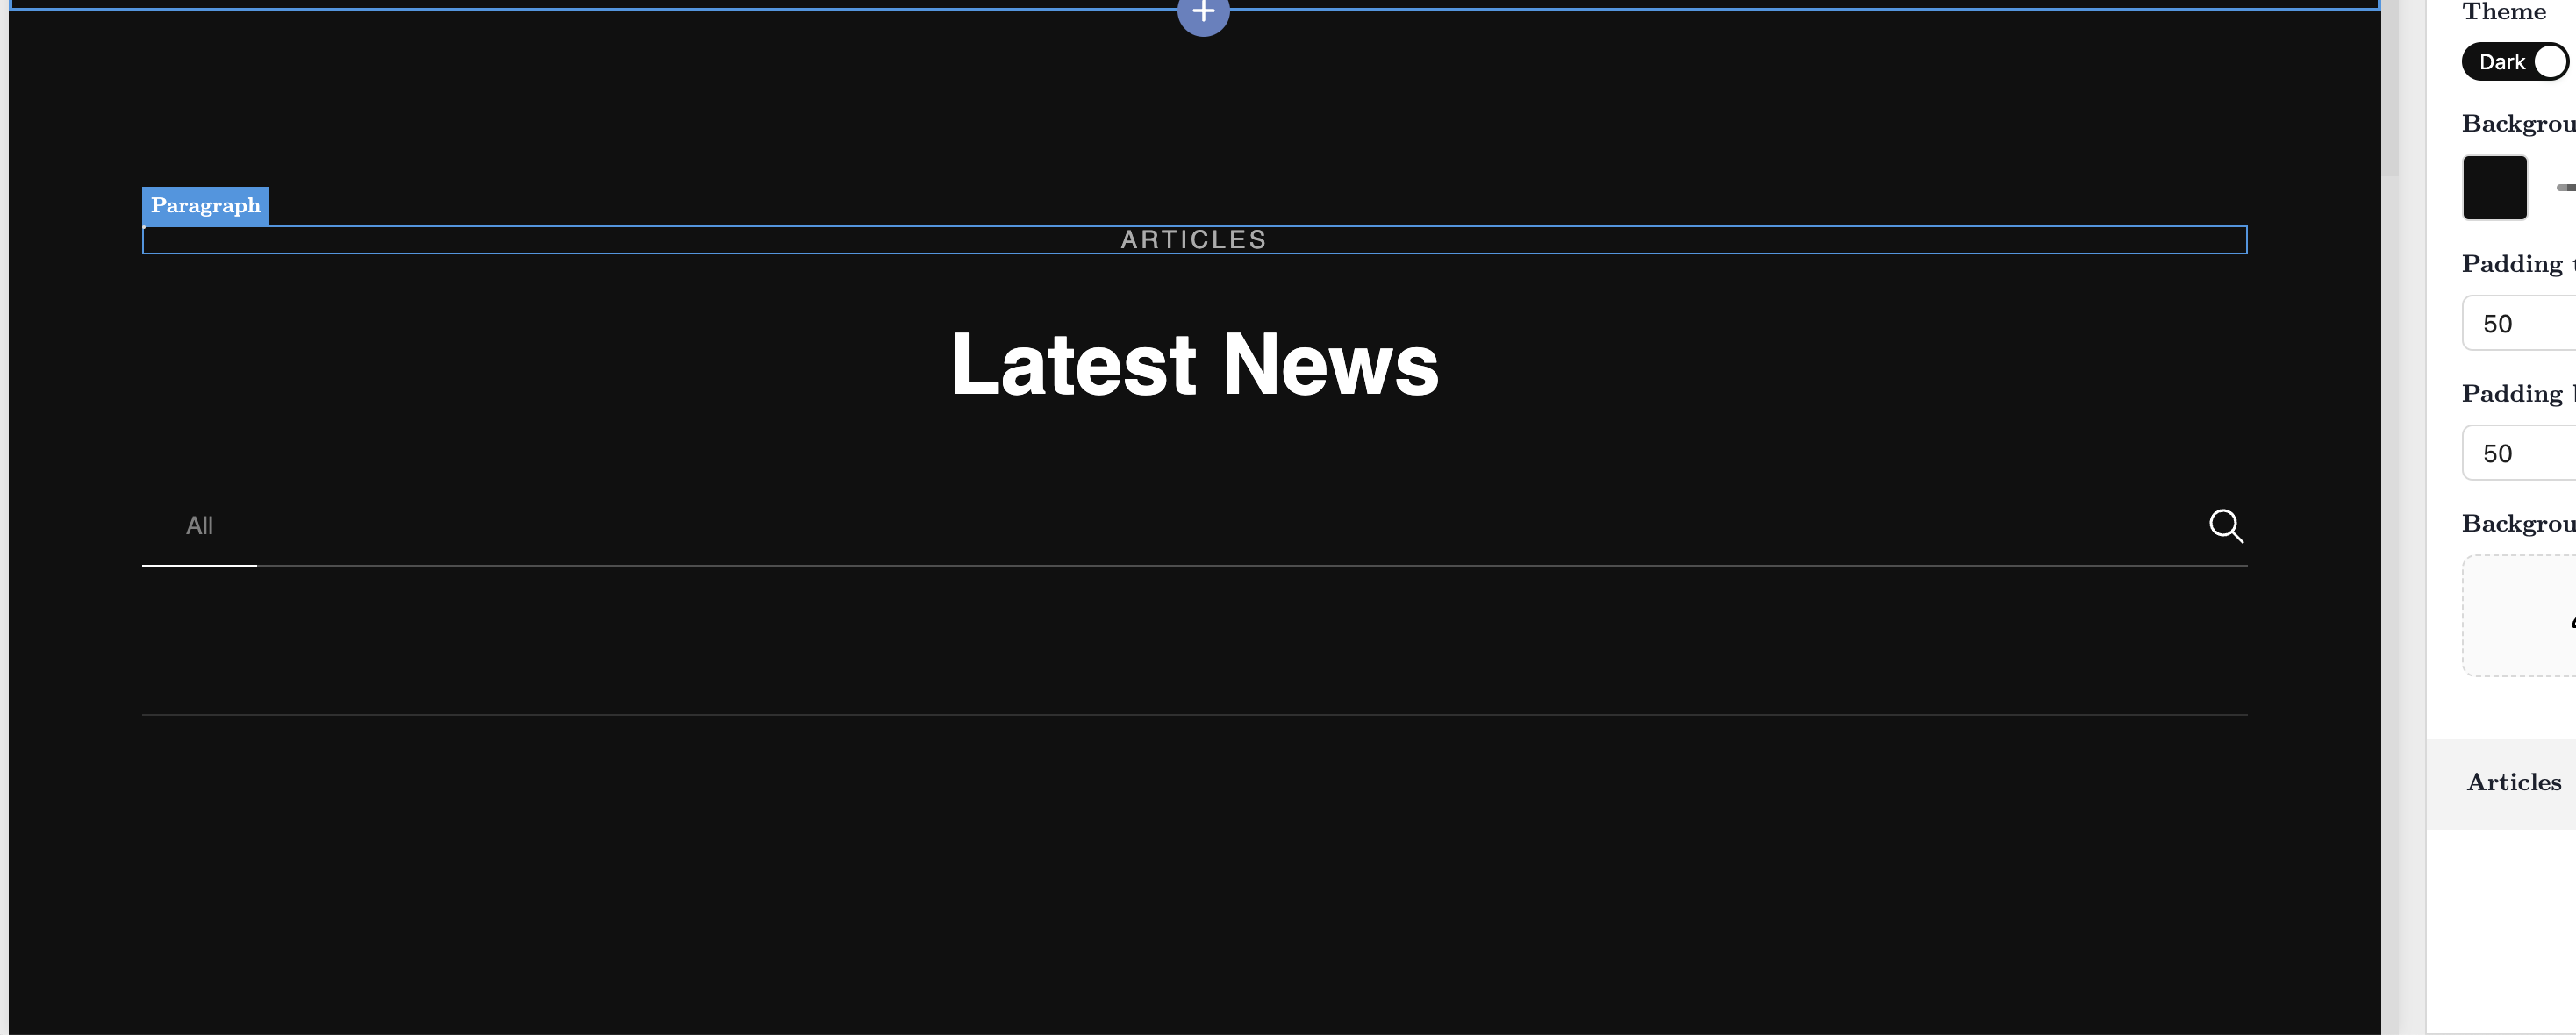
Initially, this section may look empty, especially if you haven't published any articles yet.
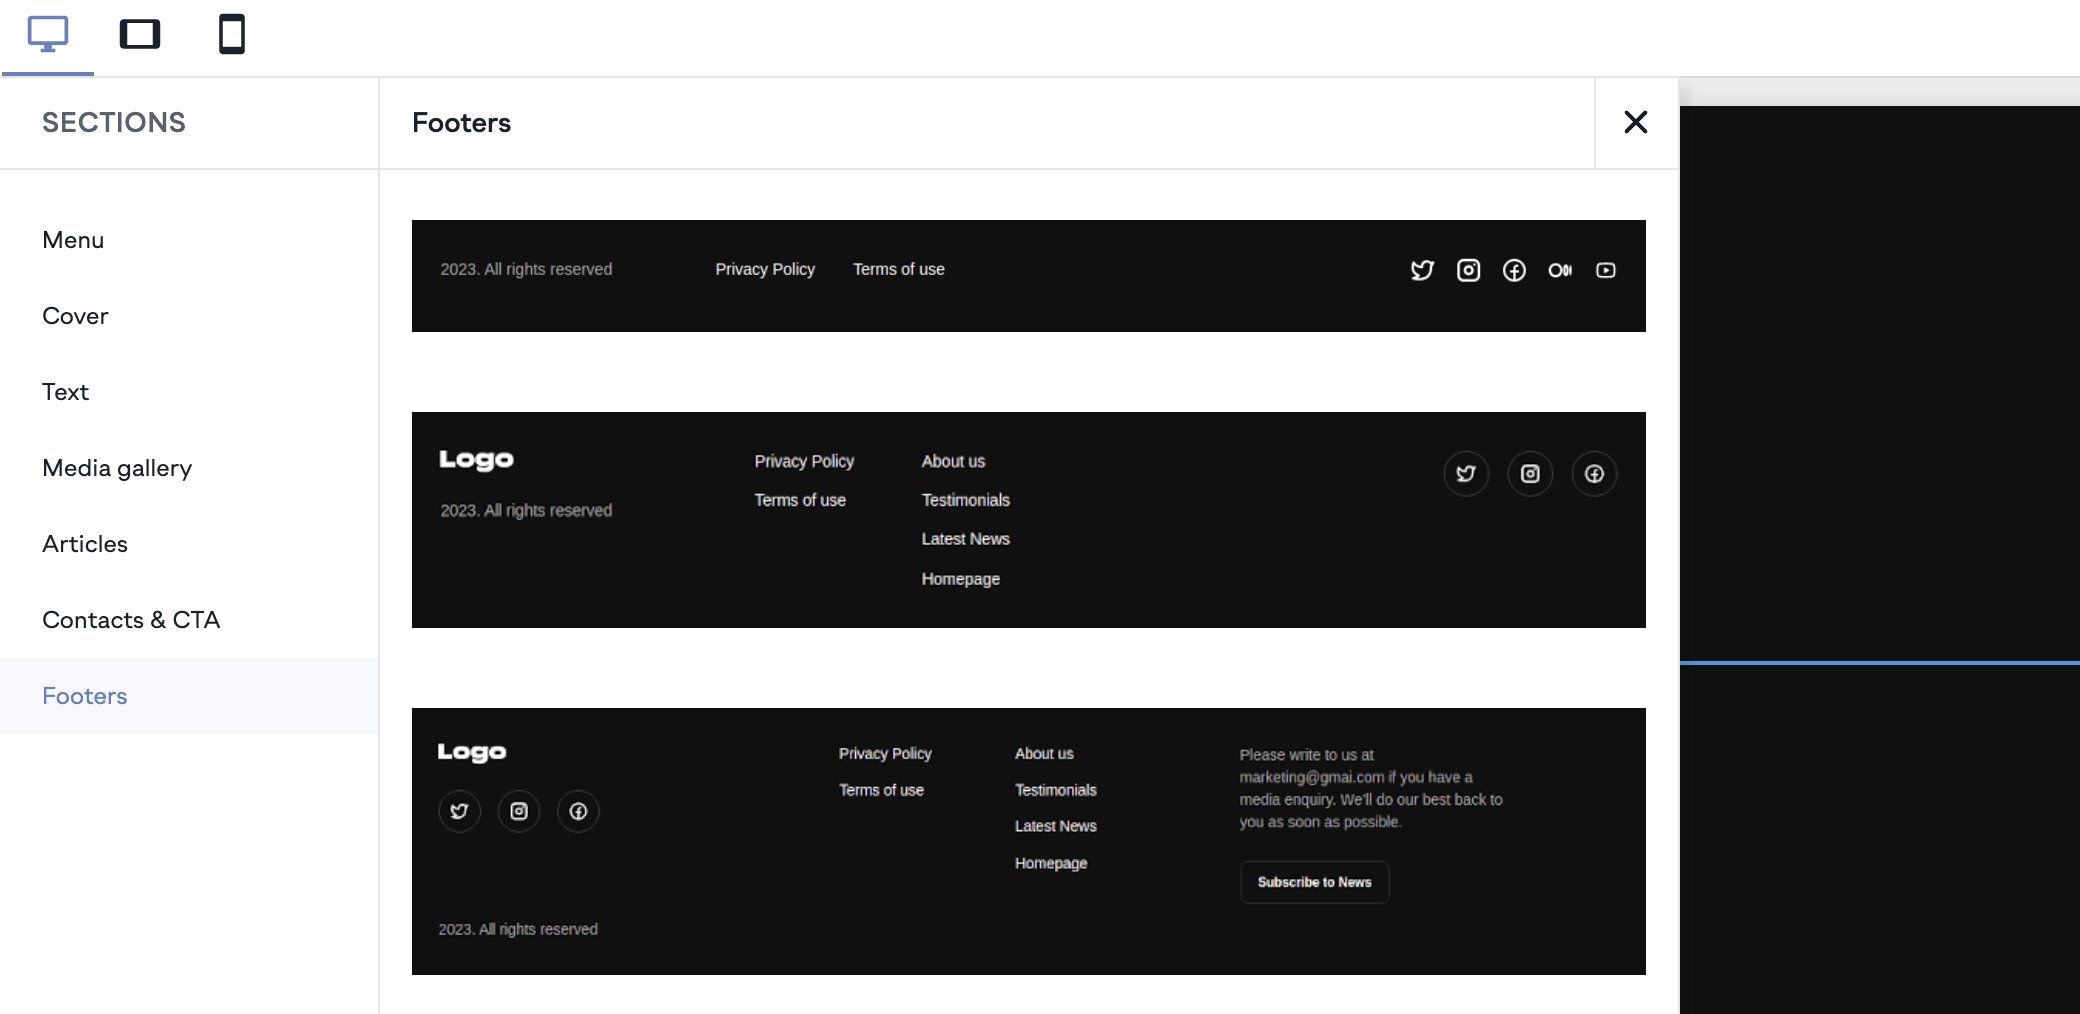
Once you have constructed the main components of your newsroom, the final step is to add a footer section. This is an essential part of your newsroom layout as it contains important information and navigation that typically stays consistent across all pages.
In the CMS, select the 'Footers' section from the template options. Here you can include your company's contact information, privacy policy, terms of use, or any other relevant links. It's also a space to reiterate your brand identity with your logo and connect to your social media profiles. Placing this at the end of your newsroom ensures that no matter how users navigate through your site, they have easy access to these essential details.
After building your newsroom and adding all the necessary sections, remember to save your changes to secure your work. Once saved, you can proceed to switch to the "Draft/Article" page.
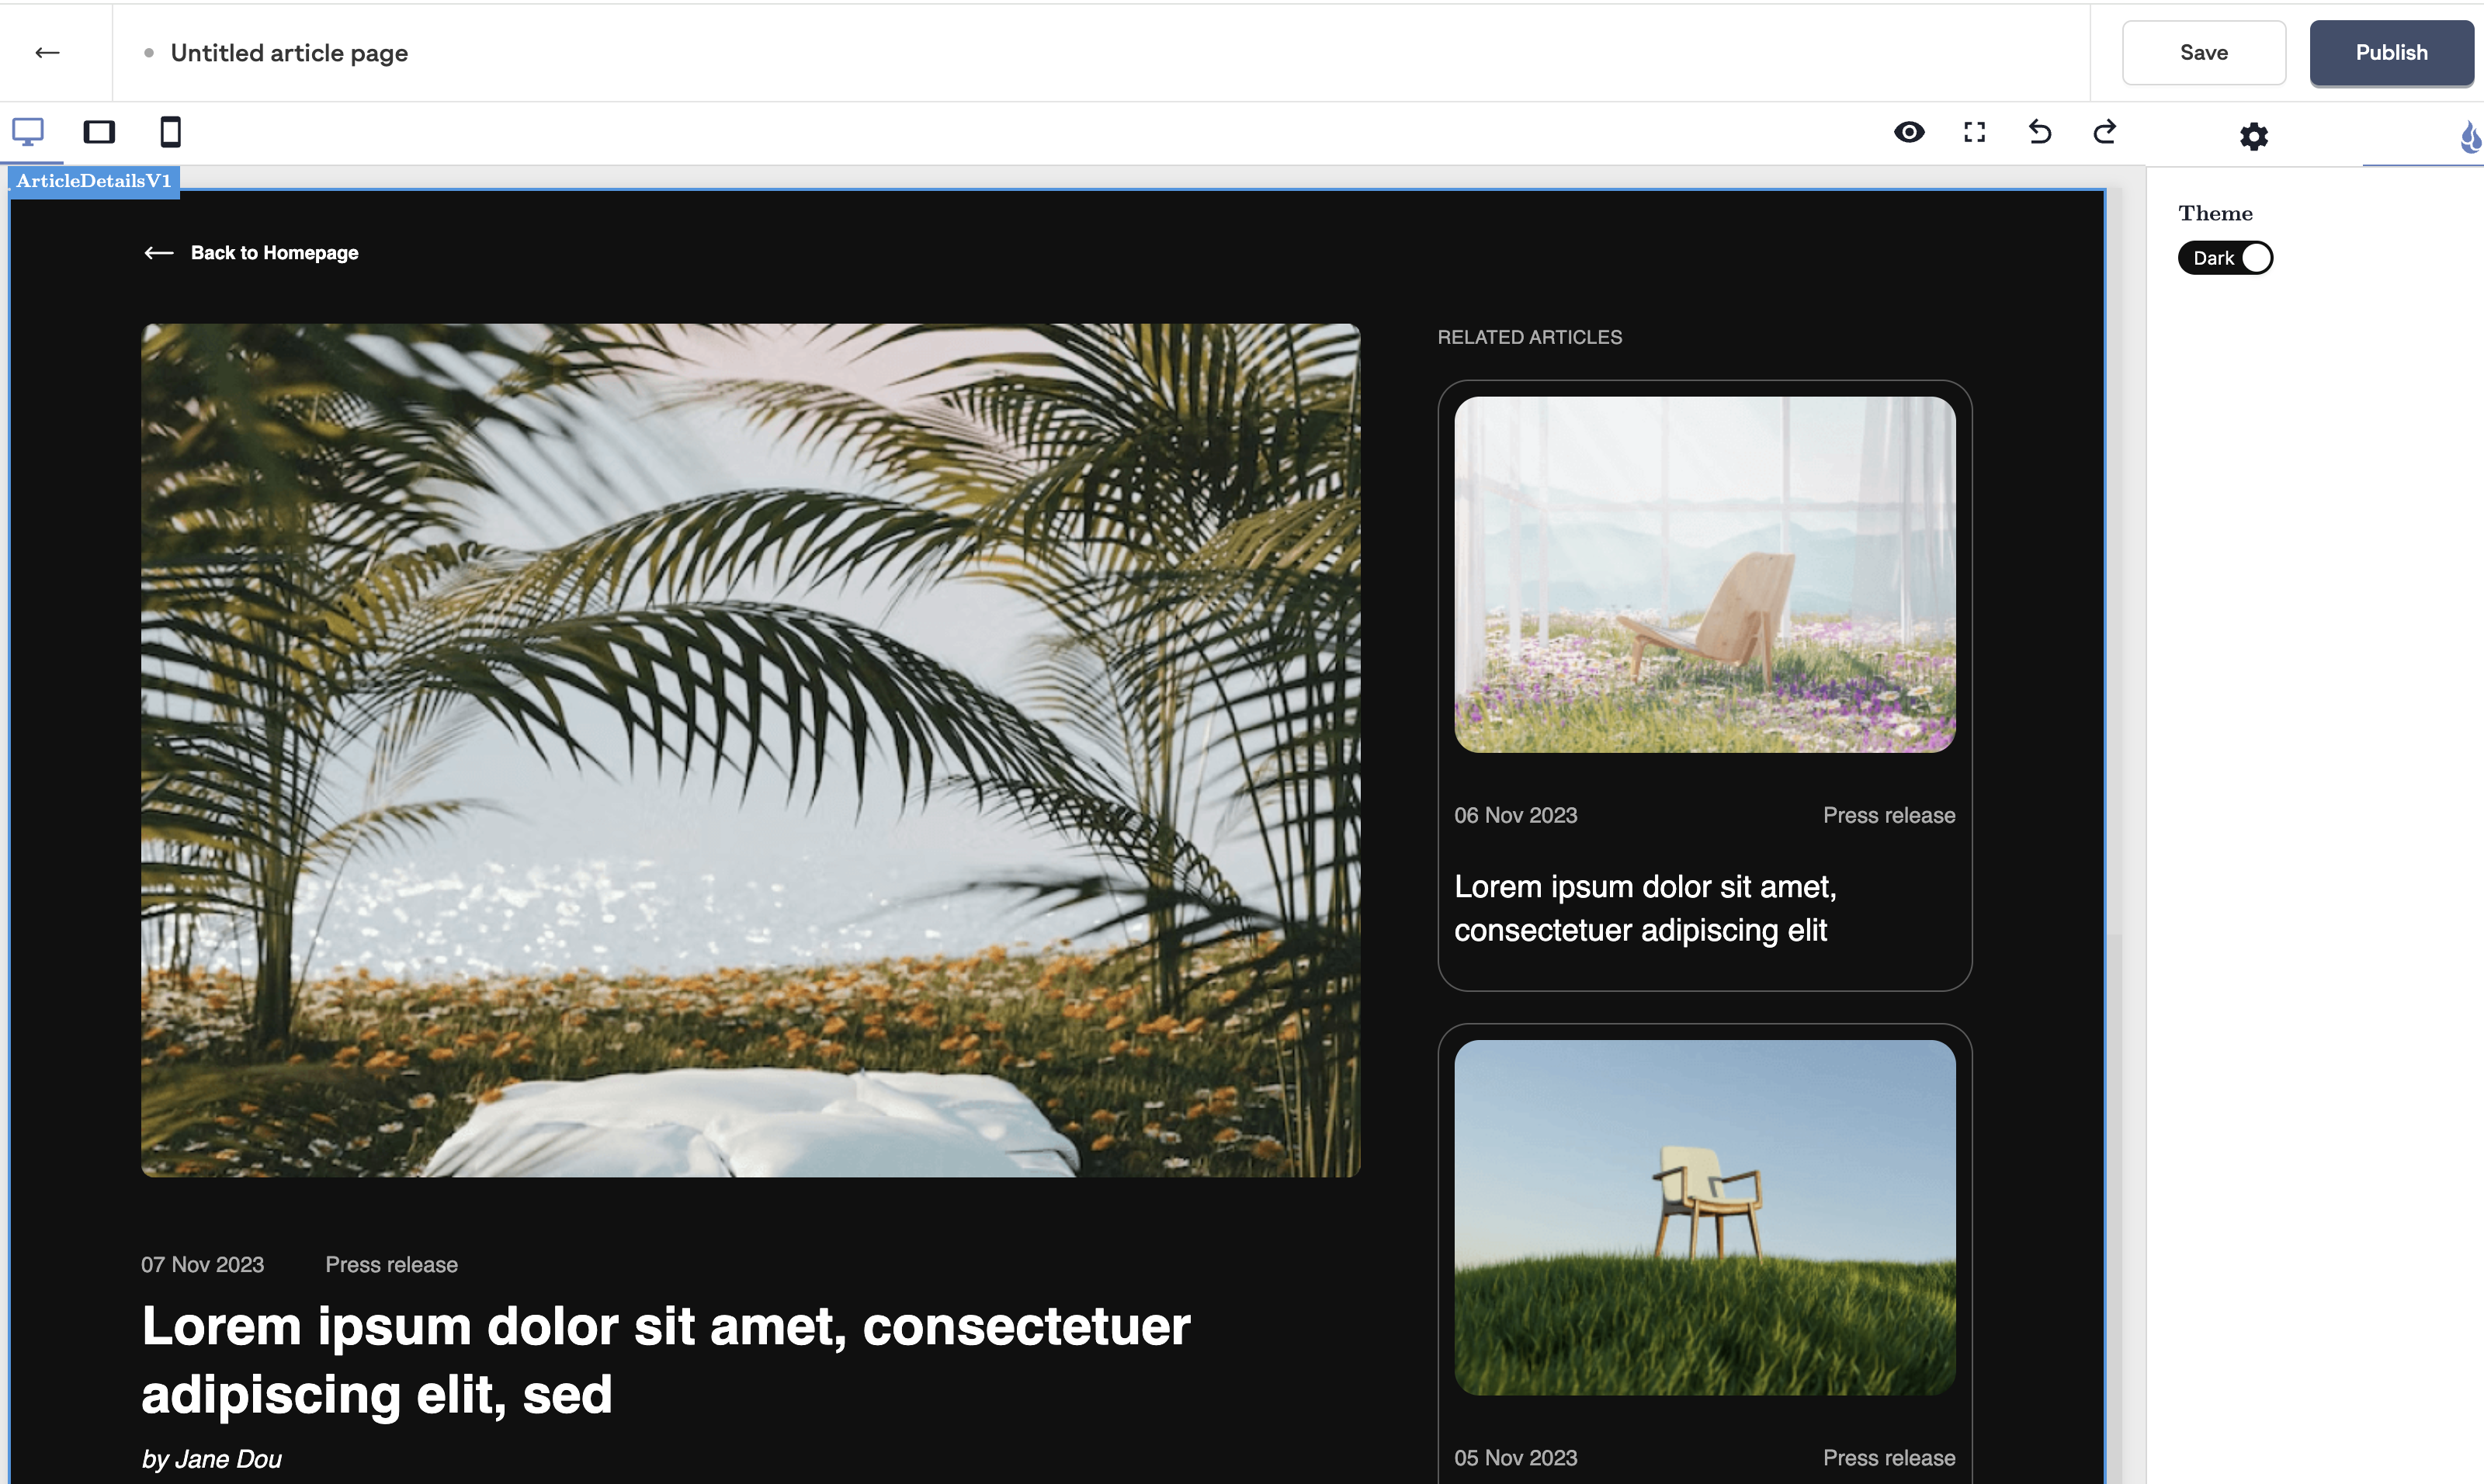
To start crafting your article page, click the plus sign. The CMS will present you with options to customize your draft page. You can choose between a dark and light theme to match the tone and visual preference of your content. Additionally, you have the flexibility to modify text in various elements to align with your article's narrative. The menu and footer from your main page will be carried over automatically.
Once your article customization is complete and saved, it's time to move to the account settings to configure the essential components of your newsroom. Click on the 'Back' arrow in the top left corner of the CMS to exit the editor. From there, navigate to your account settings where you'll set up your domain and adjust any other relevant settings.
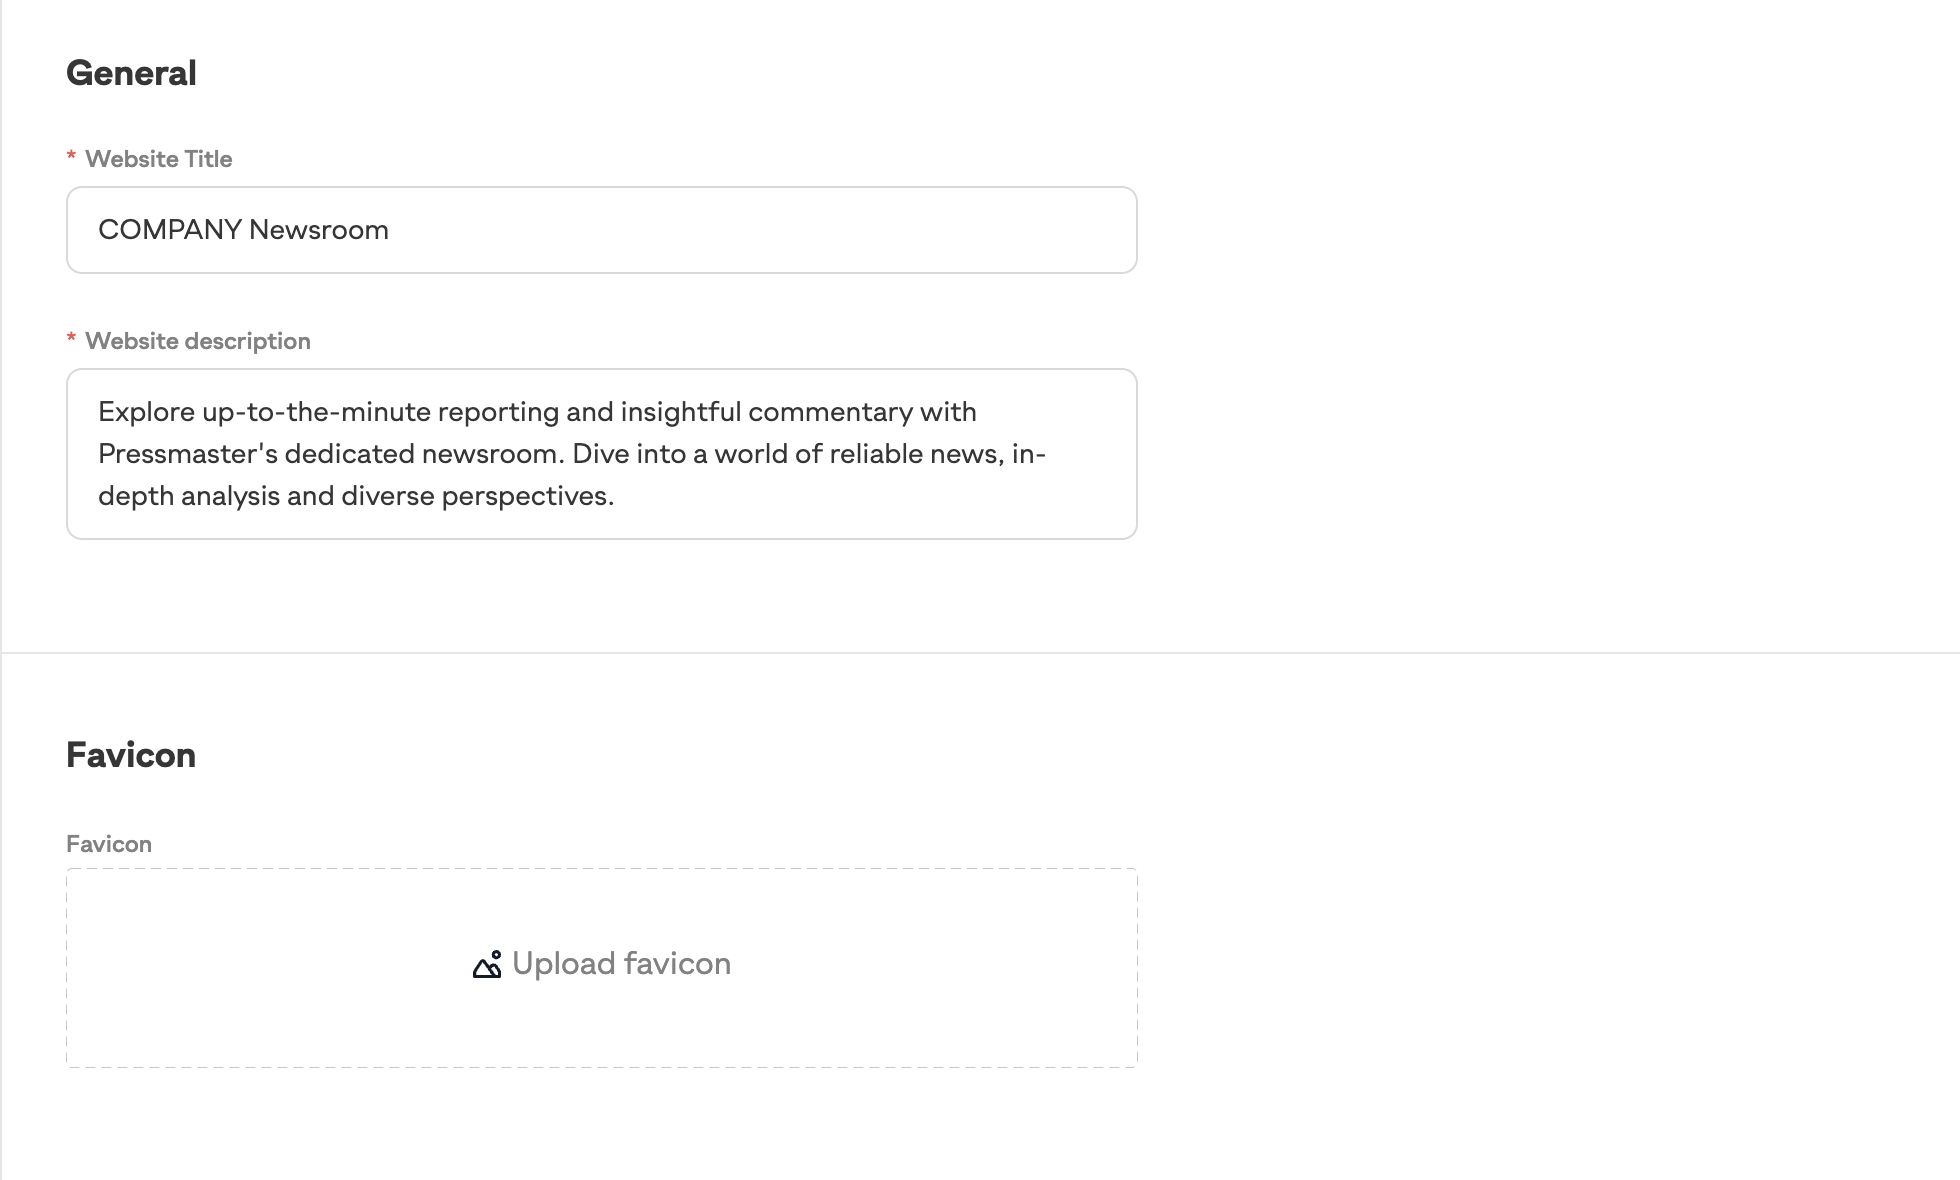
Once you click on 'Settings' in the Pressmaster CMS, you'll be presented with options to finalize the details of your newsroom. This is a crucial step in optimizing your site for search engines and ensuring users have a clear understanding of your newsroom’s purpose.
For the Website Title (Meta Title), something concise yet descriptive works best, such as "COMPANY Newsroom - Official Corporate News and Updates". It sets the right expectations and reflects a professional tone.
The Website Description (Meta Description) is where you can be a bit more detailed. "Welcome to COMPANY Newsroom. Find the latest announcements, company updates, and industry insights. Our official news source keeps you informed on what's new and next with COMPANY." This description gives users a preview of what to expect when they visit your newsroom.
The Favicon is the small icon that will appear in browser tabs and bookmarks for your site. This should ideally be your company's logo, which can be uploaded in a .ico file format. It’s a small but significant touch for brand recognition.
These elements work together to give your newsroom a professional appearance in search results and to site visitors, encapsulating the essence of your corporate identity.
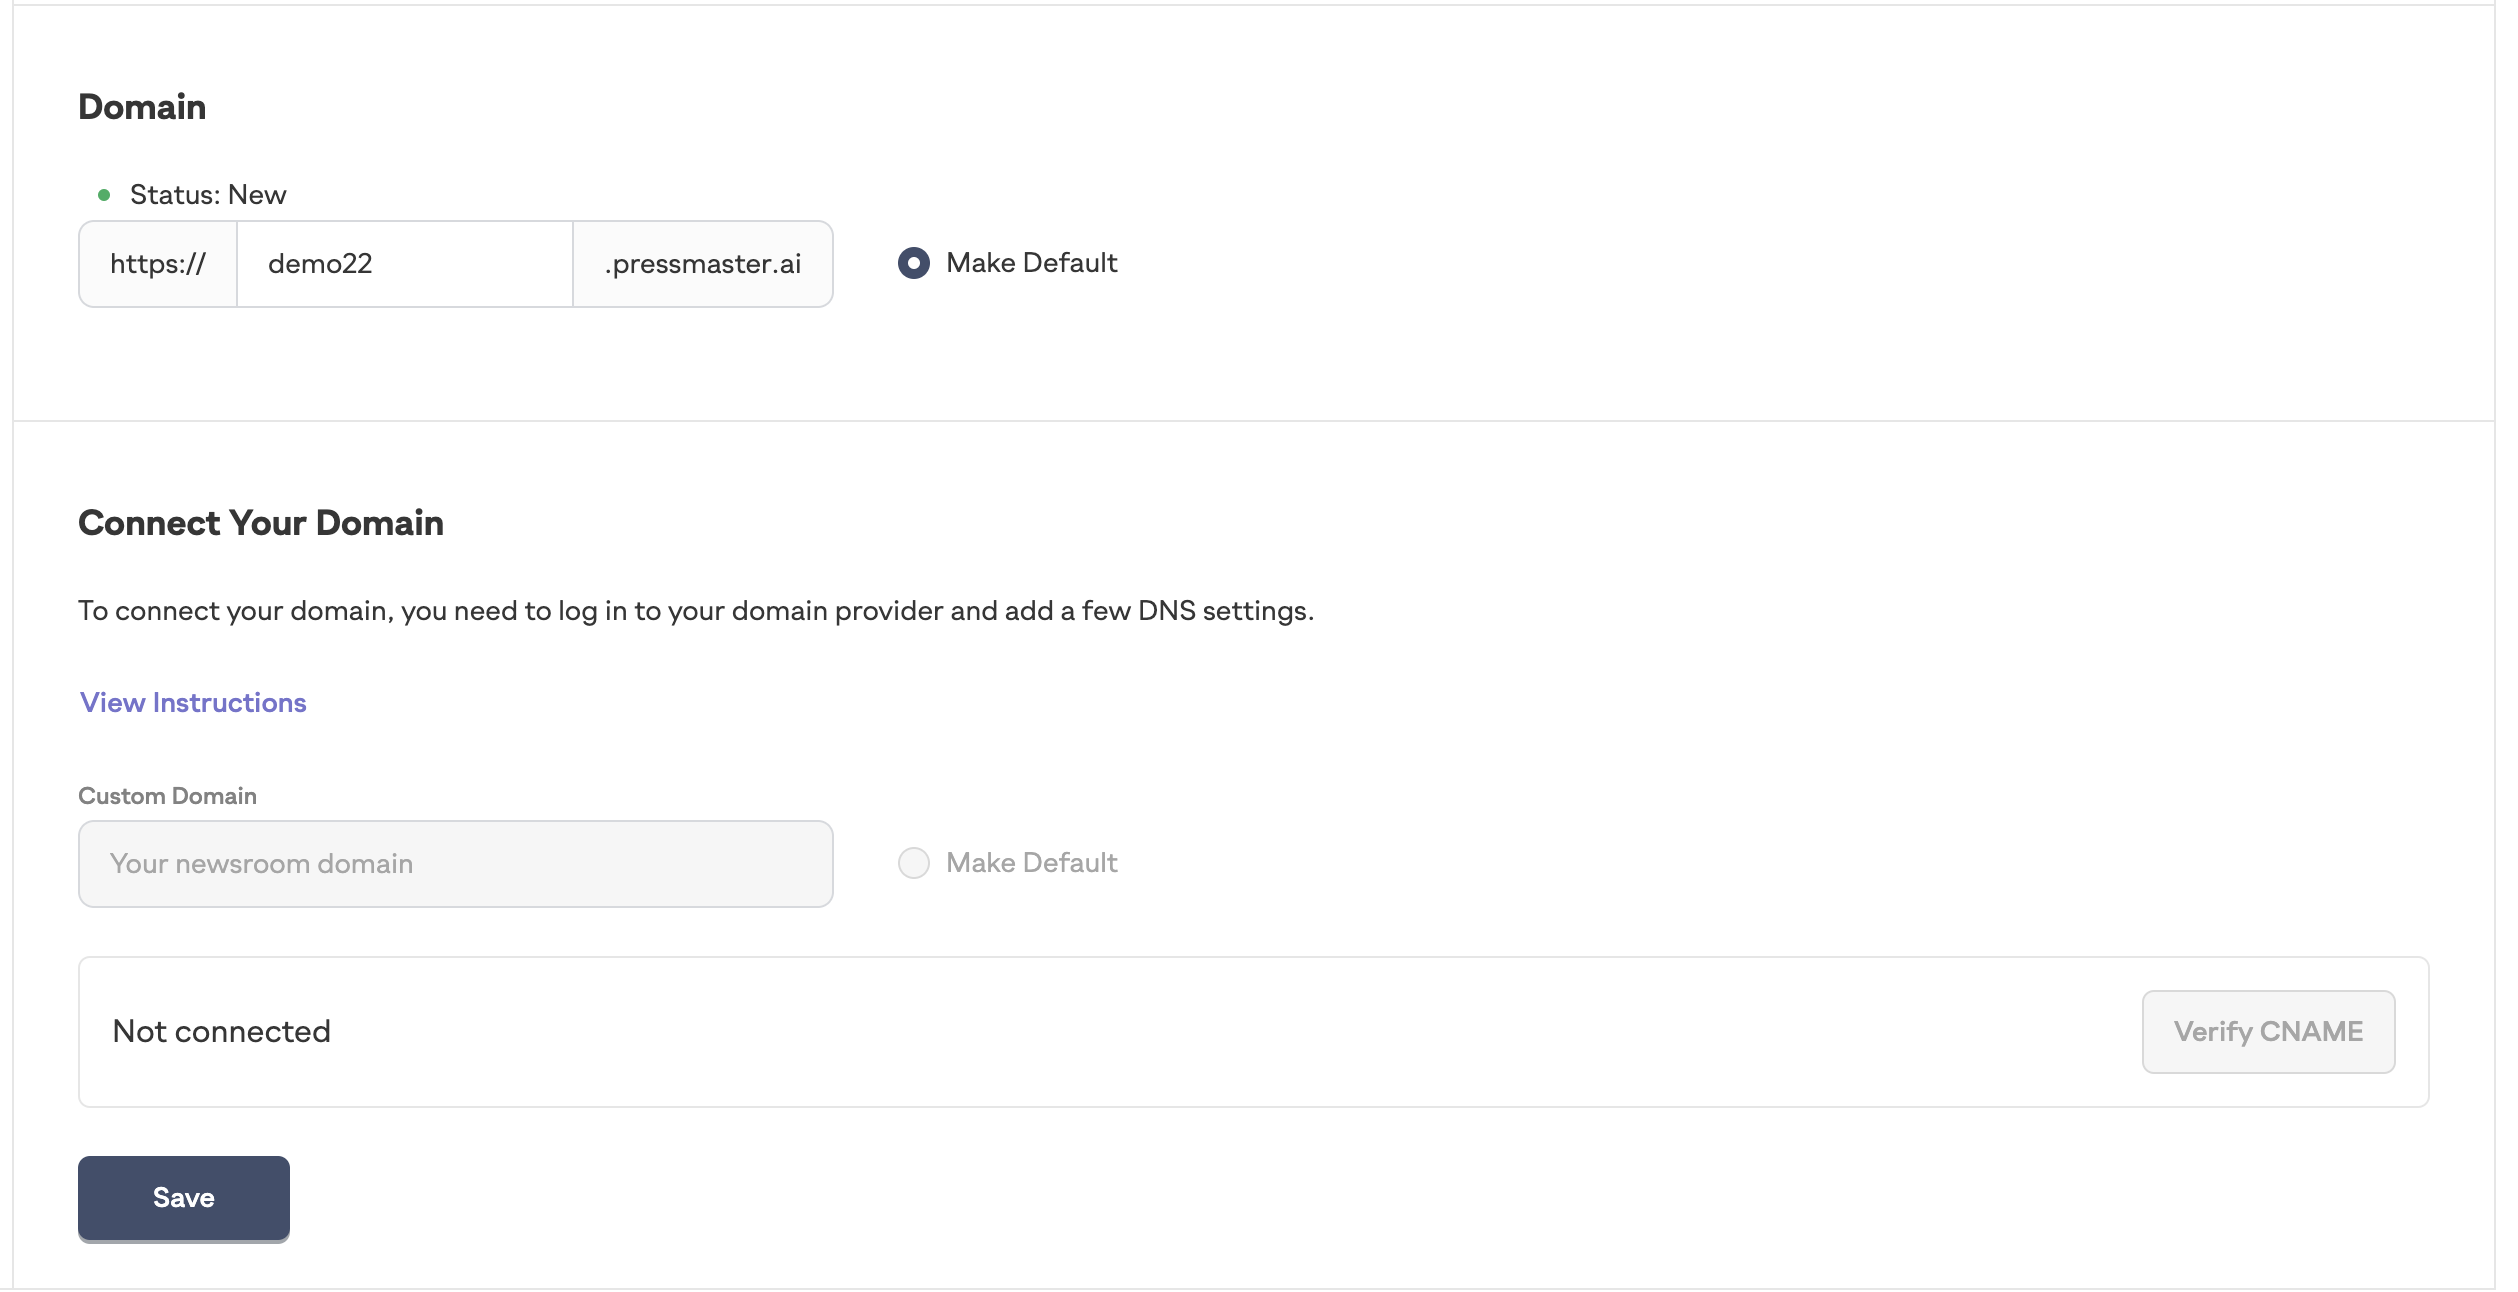
After setting up your meta title and description, the next step is to establish the domain for your newsroom. Scroll down to the domain section, where you have two main options:
A) Utilize the Pressmaster domain by creating a subdomain. You can do this simply by entering a short version of your company name in the provided field. This will create a URL like yourcompany.pressmaster.ai.
B) Connect your own custom domain. For a more branded experience, such as news.company.com, you'll need to configure a few DNS settings with your domain provider. Click on "View Instructions" for a step-by-step guide on how to point your personal domain to the Pressmaster newsroom.
Make sure to 'Save' your settings after you've entered your domain information to ensure everything is updated properly.
Once your domain is configured, you can return to the main dashboard of the Pressmaster CMS to finalize your newsroom. Navigate to each page and use the 'Publish' button to make your content and design live on the web under your chosen domain. With the domain set and your pages published, your newsroom is now officially live and ready to welcome visitors. Now, you're all set to publish your first article and begin engaging with your audience